Answers
Setting up the Partner Access tool in your account
If you would like to enable others to access your Purplepass event organizer account using their personal login information, follow these steps to set up your Partner Access tool.
Adding a partner for Partner Access in your settings
Adding a partner while creating an event
Understanding additional privilege option
Adding a partner for Partner Access In Your Settings
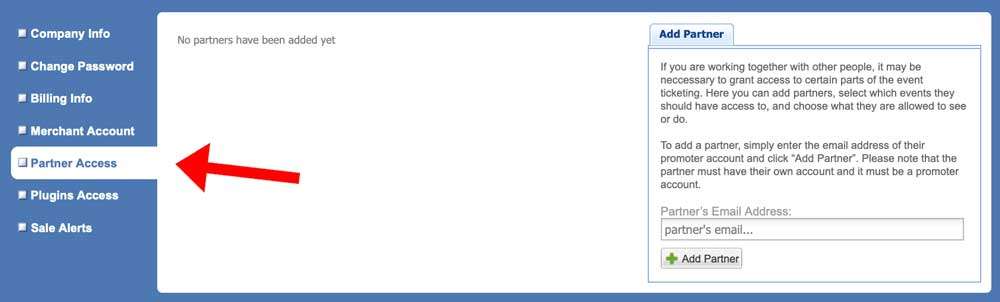
- Log in to your Purplepass event organizer dashboard
- Click Settings at the top right-hand corner of the screen

- Select Partner Access from the left navigation bar
-
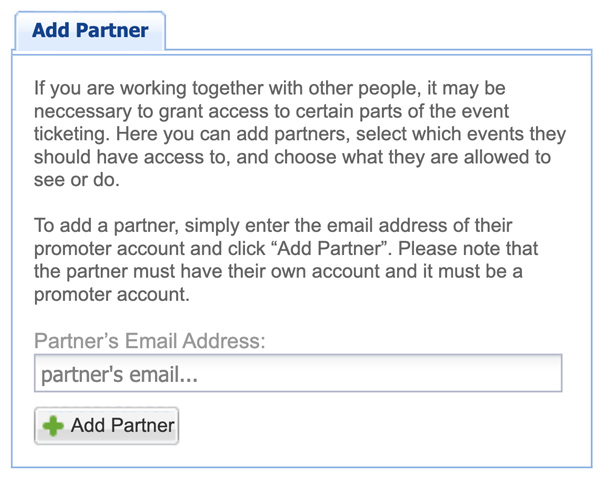
In the Add Partner, enter the person’s email address in the Partner’s Email Address:
NOTE: This person must have a registered account with Purplepass to create a partner account.
Adding a partner while creating an event
If you want to add other users while you are creating a new event, follow these steps:
- Log in to the Purplepass event organizer dashboard
- Click the Create New Event tab at the top of the navigation bar

- A pop-up carousel will appear
- Click the best event option

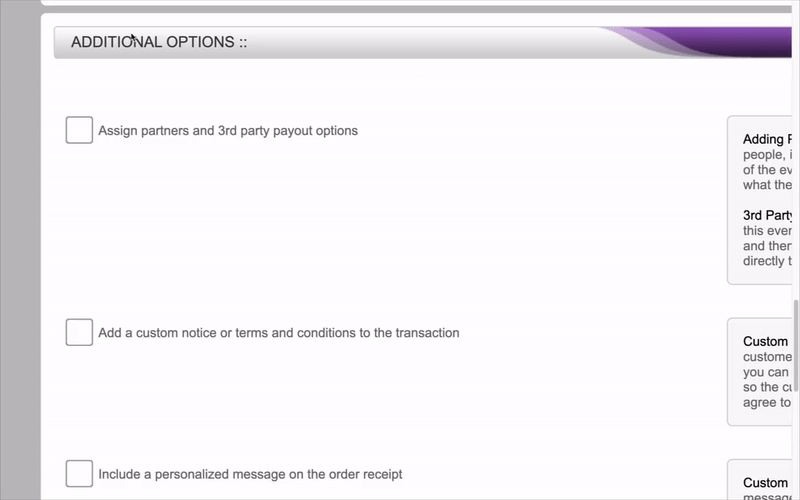
- Scroll to the Additional Options section of the page
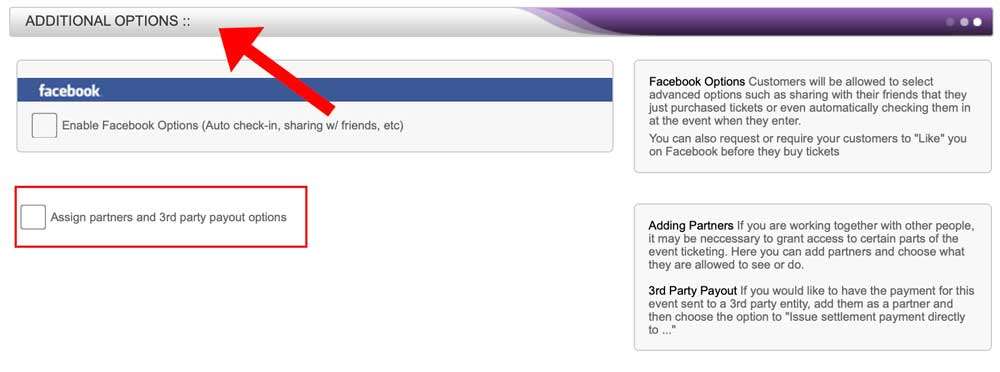
- Click +Add Partner and enter their email address in the Partner’s email address box

-
Click +Add Partner.
NOTE: If the partner doesn’t have a Purplepass account, a pop-up box will appear asking if you want to create an account. Click Yes.
- Enter the information on the account creation pop-up window that appears, and click the purple Register button at the bottom of the screen to add them
Understanding Additional Privilege Option
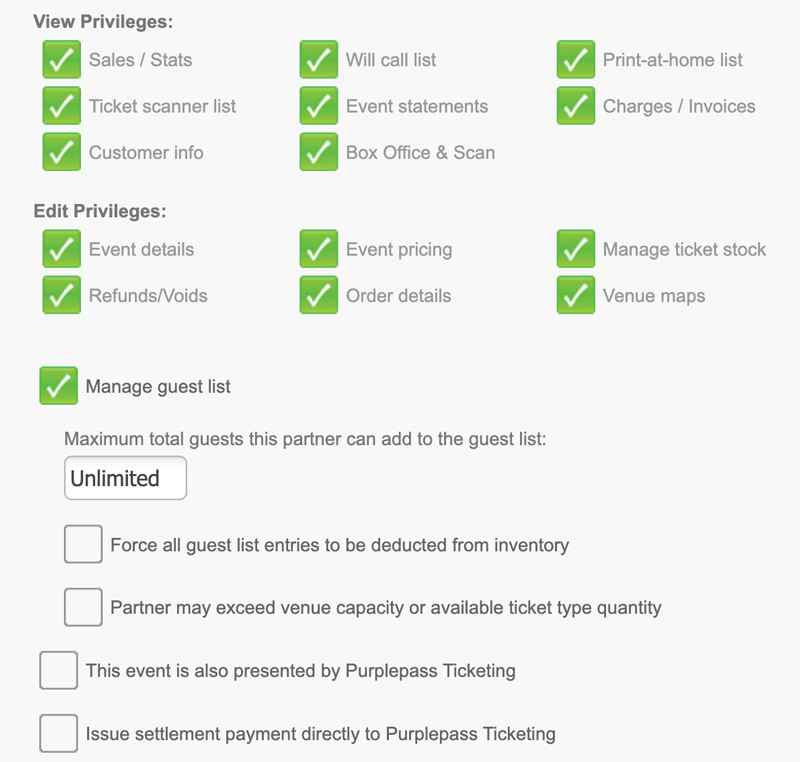
Once you add a partner or partners, you can view their privilege options.
Check the options you want this partner to have access to for your event.
NOTE: Remember, the boxes for the View Privileges section only allows them to see the information. If the Edit Privileges box is checked, they can also make changes to that item.
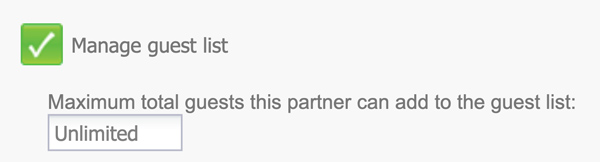
Manage guest list
If the Manage Guest List box is checked, the partner can add and delete guests. You can limit the number of guests they can add by entering a value in the box titled Maximum number of guests this partner can add to the guest list.
Below is the box titled Force all guest list entries to be deducted from inventory. If you check that box, the guests added by the partner will be deducted from the number of tickets available for the event. If you leave this box blank and check the next box titled Partner may exceed venue capacity or available ticket type quantity, the guest list won't count towards ticket quantity.
The event is presented by
For the box titled This event is also presented by ________, you can check the box to have this information appear on the event. Once you check the box, a blue link will appear below titled Edit display options and assign order of _______.

Once you click that link, a pop-up window appears with the option to add the entity or people presenting the event. If you check the box titled Do not show as presented by _______, no information will appear on the event. If you uncheck the box, a pop-up window appears with options to add as Presented by ______. There will be one or more options available, and you can rearrange the order they appear with the arrows on the left of the name, or you can delete them.
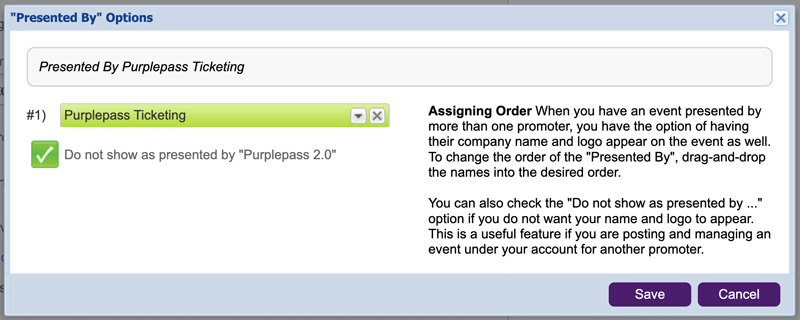
Once you're finished adding the presented by information, click the purple Save button at the bottom of the pop-up window to save each individual partners access.
Issue settlement payment directly to
The last checkbox box, titled Issue settlement payment directly to _______, allows you to send event revenue/ticket sales revenue to this person or entity.