Answers
The basics to building and customizing your seating maps
With Purplepass, our maps are built to be true-to-form with all the curves, rows, and aisles, and everything is shown true to scale. Promoters can customize their custom seating maps by adding graphics, media, logos, selecting colors, etc. Below is a quick guideline for creating and customizing your seating maps in Purplepass.
Adding different seat types to your map
Adding price levels and colored sections
Adding a stage graphic or custom images
Adding images to your seat with the seat preview tool
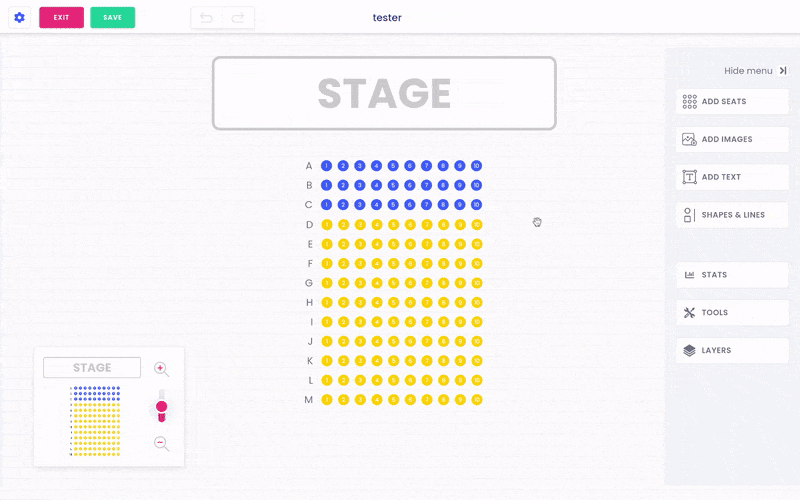
Adding different seat types to your map
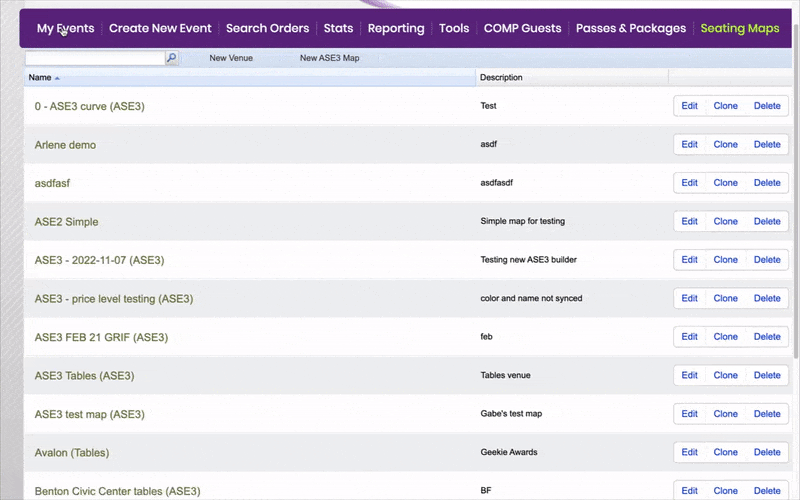
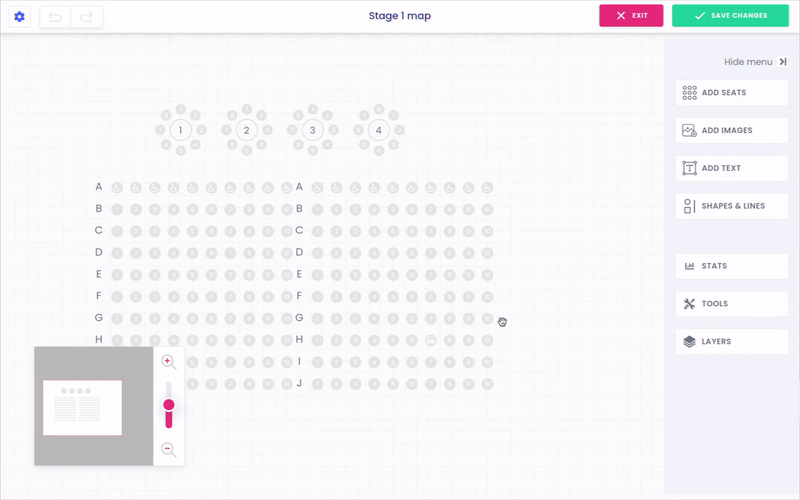
- Log into your Purplepass promoter dashboard
- Select Seating Maps

- Select Edit for the map you want to edit
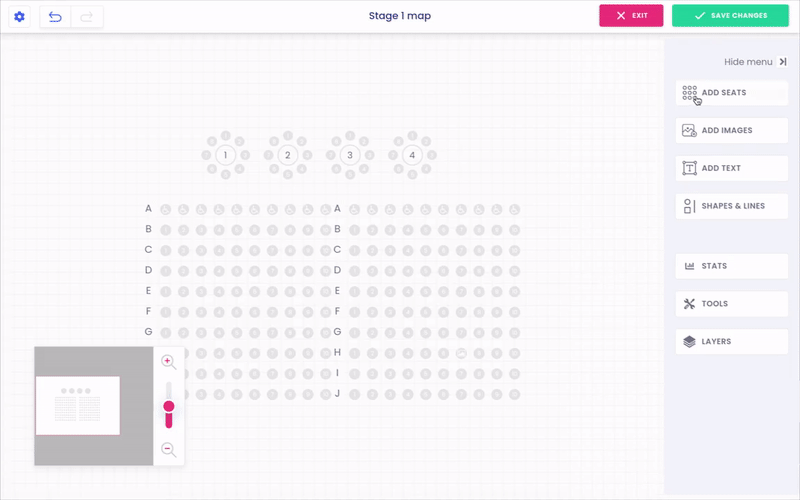
- A map will appear in a new window
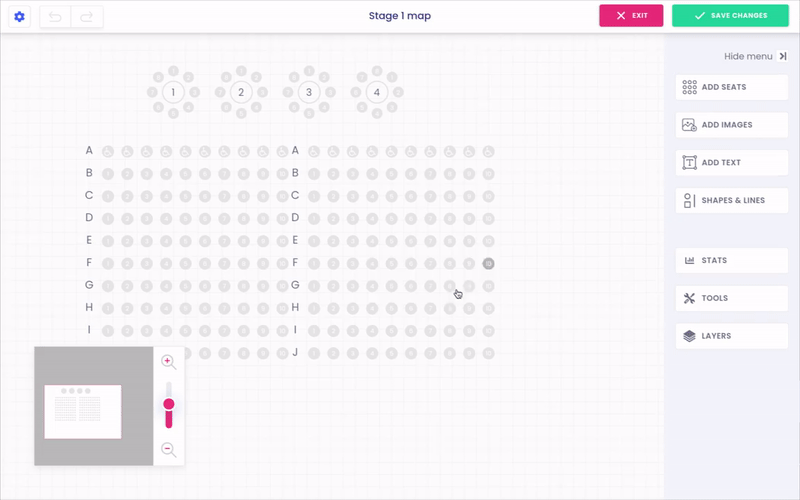
- To add seats, select Add Seats on the right-hand side navigation bar
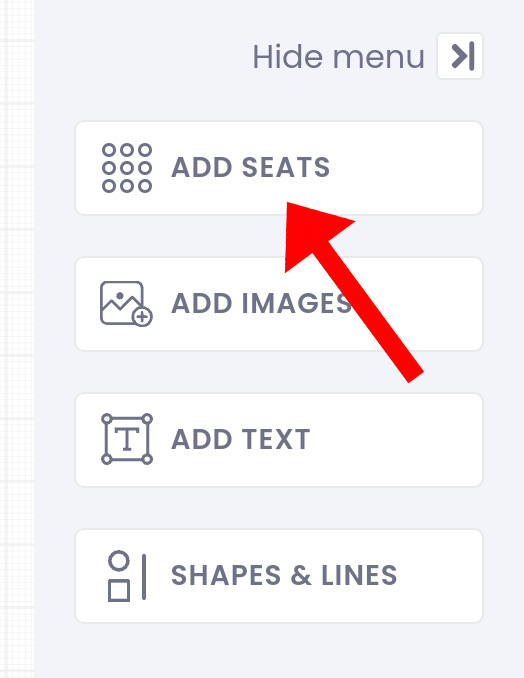
- A pop-up window will appear
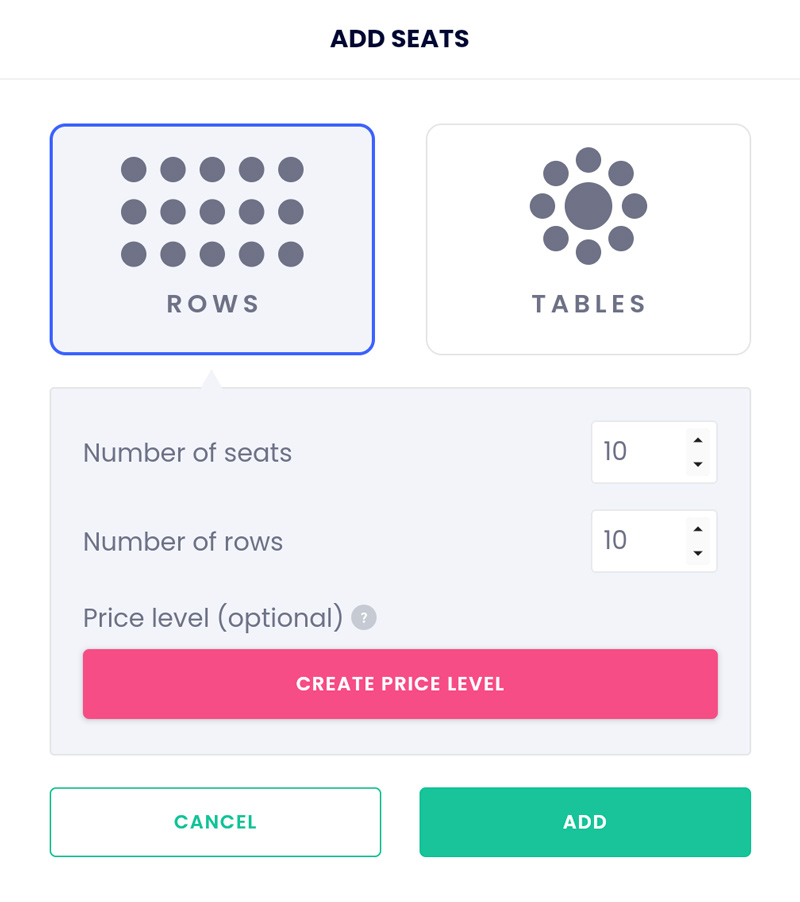
ADDING ROWS
- To add rows, select the row icon
- Below, you select the number of seats and rows you want to start with
- You can also create a price level and color to go along with your seats
- When you’re ready, select add
ADDING TABLES
- To add tables, select the table icon
- Below you will see the table options to select from (round, square, rectangle)
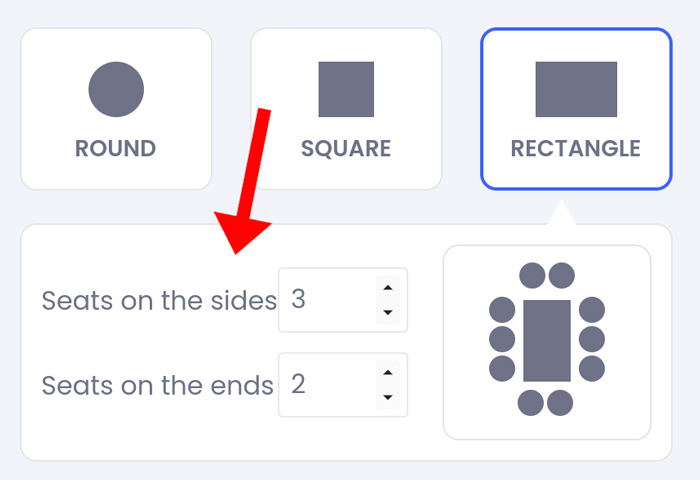
- Depending on the table shape selected, you can customize the seating layout below
- You can also create a price level and color to go along with your seats
- When you’re ready, select add
For tips on adjusting the placement of your seats and rows, click here.
Adding price levels and colored sections
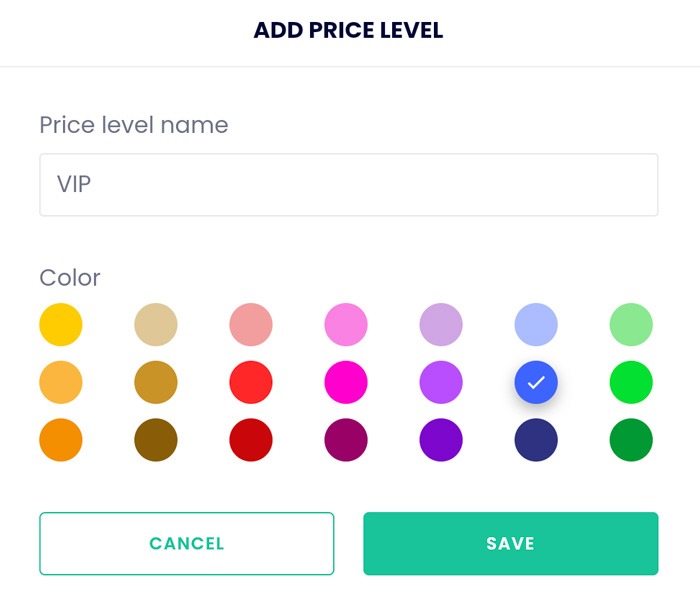
You can create custom seat sections with different pricing levels. For example, VIP seating for $25.00 and general seating for $10.00 and use colors to separate these seat options on the map.
To add pricing levels, you have two options.
OPTION #1 - Add when creating new seats
- To add seats, select Add Seats on the right-hand side navigation bar
- A pop-up window will appear with one option being to create a price level
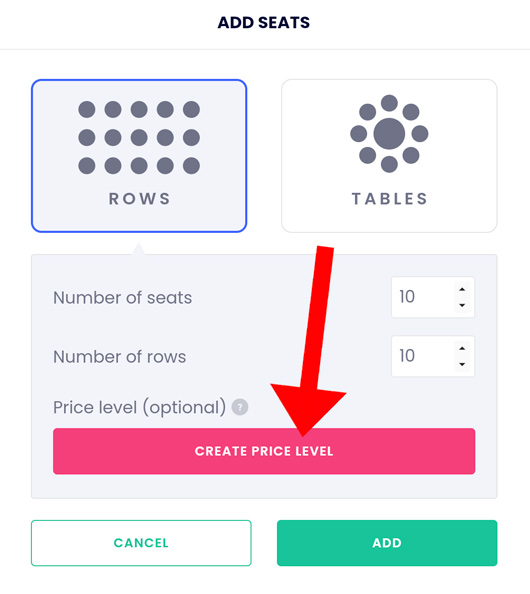
- Select Create Price Level and a new pop-up window will appear with options to label your section and select a color
OPTION #2 - Add to already existing seats
If you already have seats selected, simply select a seat or group of seats and a sidebar will appear with the option to create a price level.
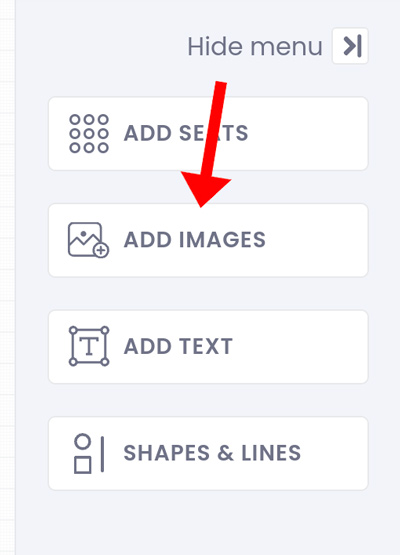
Adding a stage graphic or custom images
The seating map builder comes with an image library that offers a variety of seating map graphics as well as other icons such as restroom logos, accessibility, ATM, etc. Follow the steps below to add a stage graphic to your map.
- In the seating map builder, select Add Images in the right-hand navigation bar
- A small pop-up will appear, select Image Library
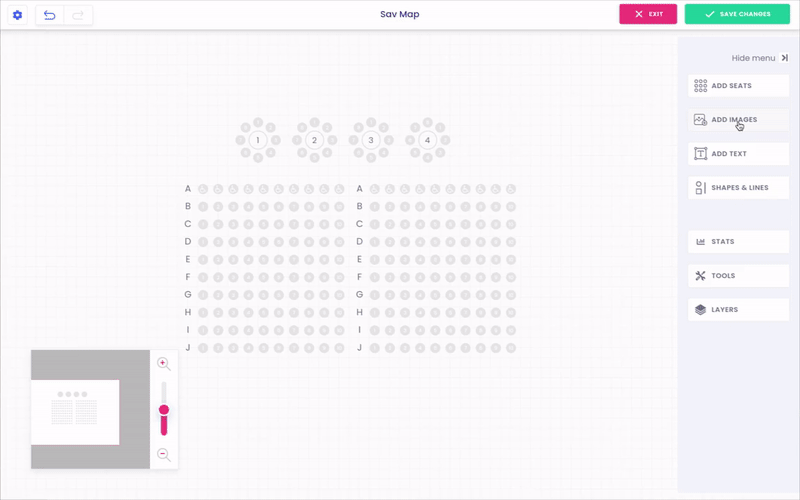

- A pop-up window will appear where you can select different stage graphics and icons
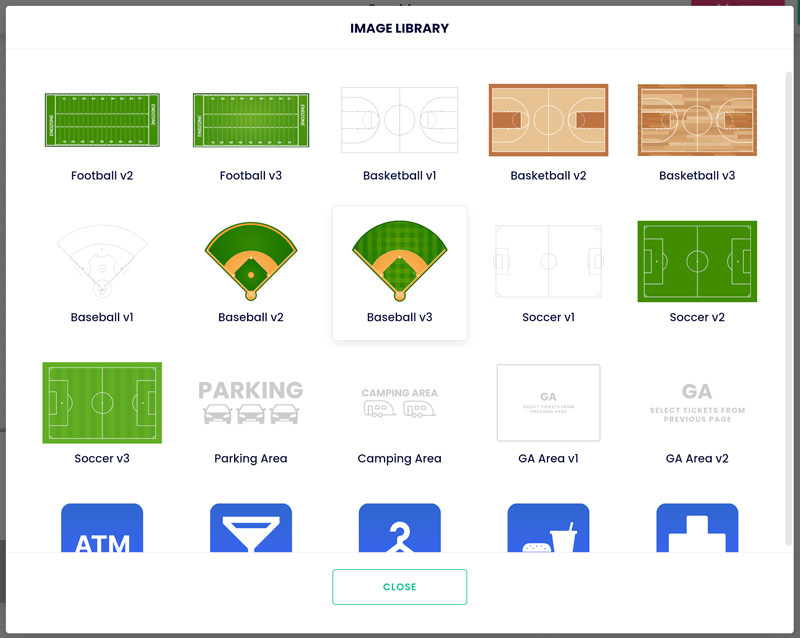
- After you select your stage, it will appear on your map
- Drag it to where you would like it to be
- You can also adjust the image properties by clicking on the image/graphic. NOTE: To return to the main navigation menu, click anywhere in the open space on the grids or click on the "X".
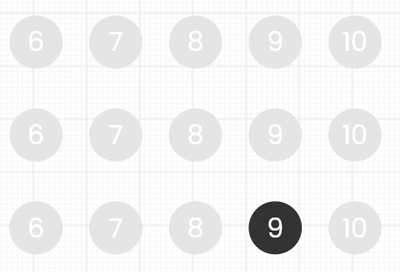
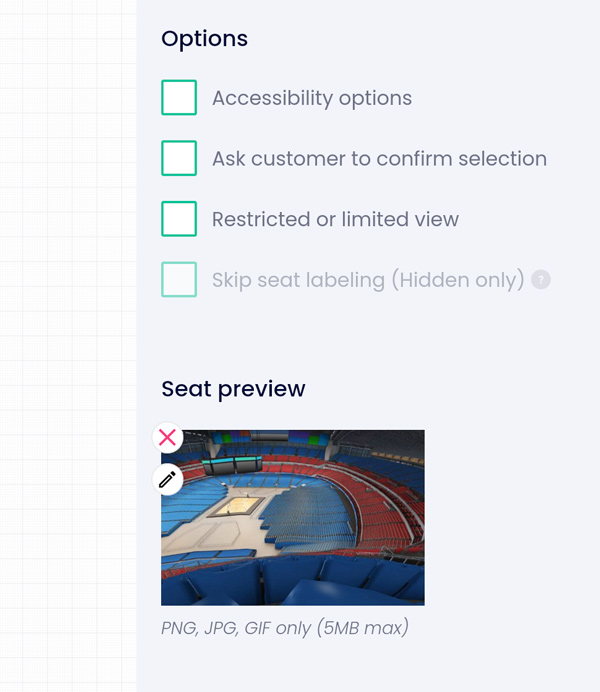
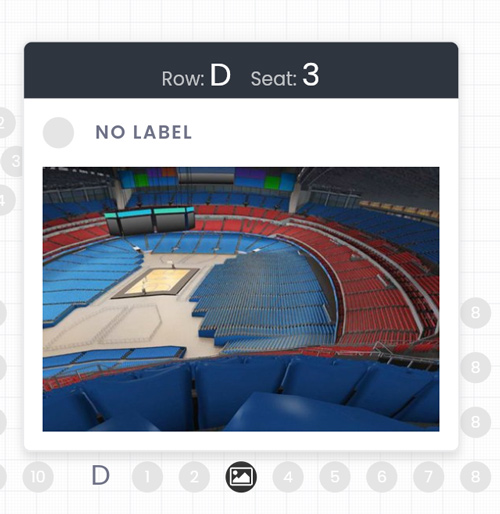
Adding images to your seat with the seat preview tool
- Once in the seating map builder, select the seat you would like to add a seat preview to
- A sidebar will appear
- Scroll down to the seat preview
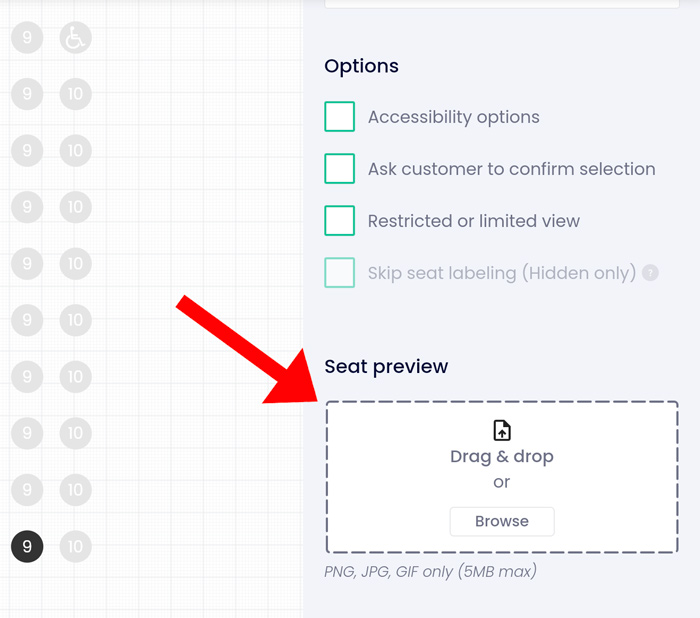
- Hit Browse and select your image
- Once uploaded, the image should appear in that box
- You should also see the image when you hover over that seat on the map
Map Keyboard shortcuts
MOVEMENTS
Move selected objects 1px at a time (below)
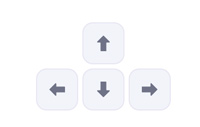
Move selected objects 10px at a time (below)

Forces map to move even if your mouse is over seats (below)

SEAT SELECTIONS
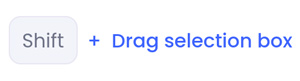
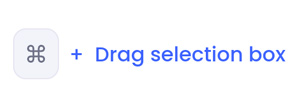
Draw box to mass selected seats (below)
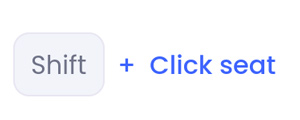
Select all seats between last seat and newly clicked seat (below)
Select all seats in that row (below)
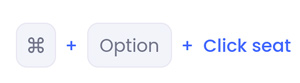
Select all seats in the block/table (below)
OBJECT SELECTIONS
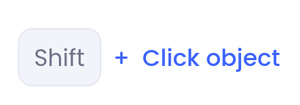
Select or deselect multiple objects (below)
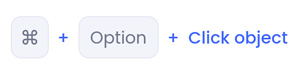
Draw box to mass select objects (below)