Answers
Creating a flex pass
Creating a flex pass provides customers the ability to purchase a pass for events they are interested in attending, rather than the entire season. With the flex pass, you can add as many tickets from as many events to your account as you’d like. However, with a season pass, users can attend the games or events of their choice throughout the entire season or year, without the flexible option of a flex pass.
For example, if you are promoting a variety of events not related to each other, but in your account, you can include them on a flex pass in case customers are interested in attending those other events.
- Log into your Purplepass event organizer dashboard
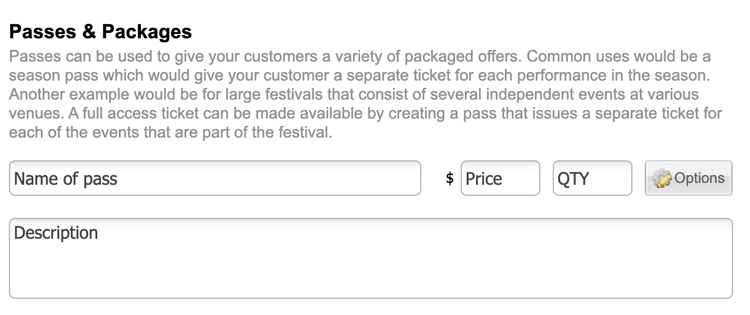
- Select Passes & Packages

- Scroll to the header Passes & Packages to create your flex pass (Create new pass/package)
- Enter the name of the pass, the price, and the number of passes you intend to offer
- Enter the description of your pass and which events or event types this pass includes
- Complete the on-screen questions regarding revenue distribution. NOTE: Scroll below for more information on revenue distribution.
- At the bottom, check Enable the flex pass option. NOTE: This flex pass option will provide you with additional customization options for event registrations, reservations, and limitations on the number of events that can be attended with the flex pass itself.
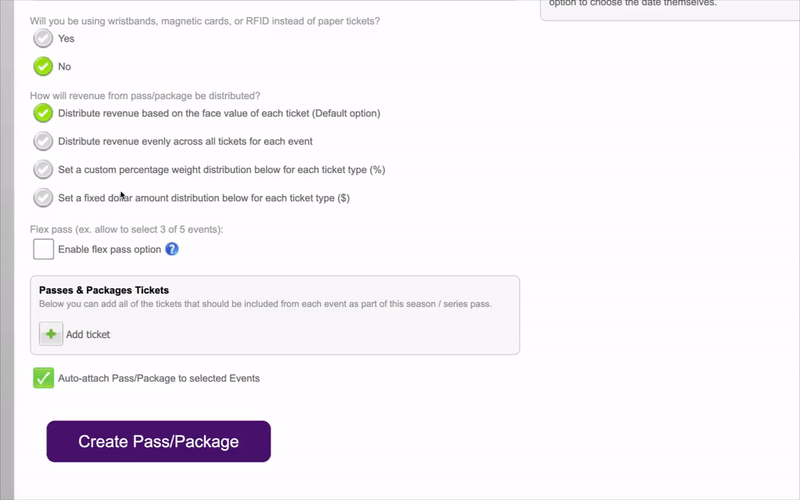
- Check which options apply to your flex pass after selecting Enable flex pass button. The following options will appear:
- Allow the customer to choose the same event more than once for their flex pass
- Show date & time of each event to customer when selecting the flex pass
- Show ticket type of each event to customer when selecting the flex pass
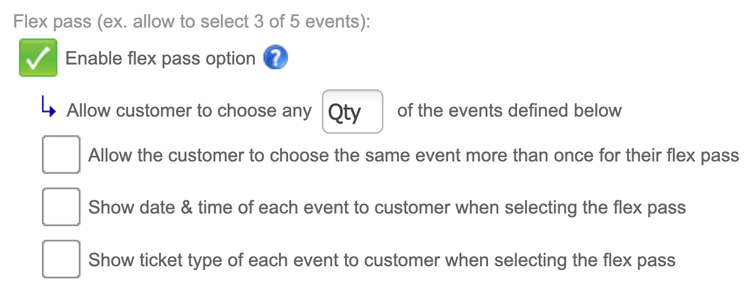
NOTE: Allow customers to view the date and time of each event they are interested in attending to prevent and avoid confusion. The easier it is for a customer to navigate the flex and season pass menus you offer, the more likely you are to make sales and generate revenue.
Distributing revenue for events
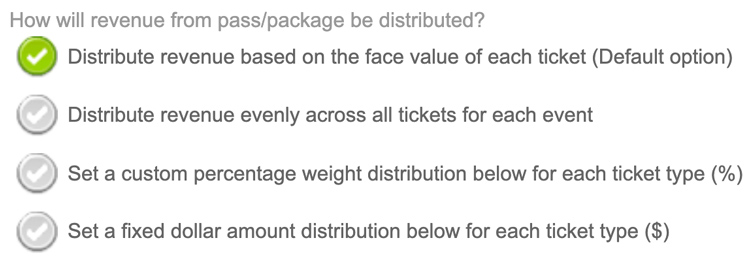
With Purplepass, it is possible to choose how you will distribute the revenue you generate from a specific flex or season pass package. While creating your passes, it will prompt you to choose between the following options:
- Distribute revenue based on the face value of each ticket (Default option)
- Distribute revenue evenly across all tickets for each event
- Set a custom percentage weight distribution below for each ticket type (%)
- Set a fixed dollar amount distribution below for each ticket type ($)
Attaching passes to an event
NOTE: You need to have a pass already created, or you won't be able to attach anything to that event.
- Create a new event or edit an existing one
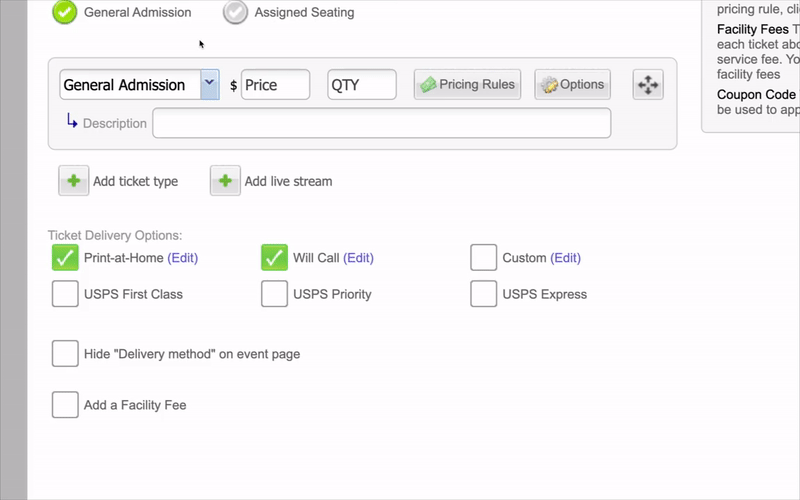
- Scroll down to the Ticket Pricing and Options when editing or creating a new event
- Select Season/Series Pass or Package/Group from the ticket type dropdown
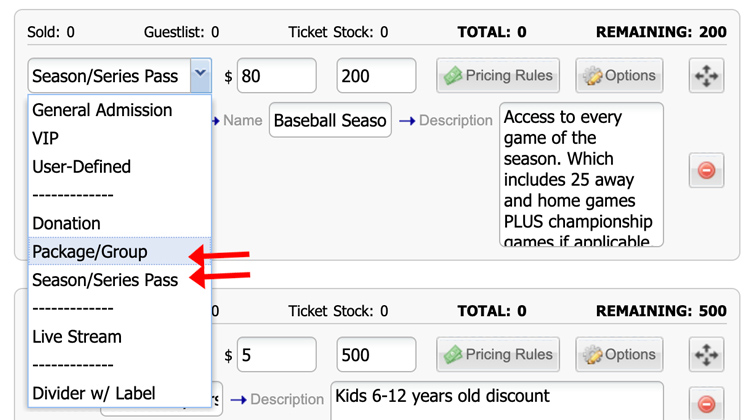
- Choose the season pass or flex pass name from the dropdown that appears once you select Season/Series Pass or Package Group
- Enter the description of the pass (optional) and review the items and events included with the pass before finalizing your event changes
To view stats and data related to your flex pass sales, follow these instructions.