Answers
How to create a custom print-at-home tickets
Instead of physical ticket stock, you can create custom print-at-home ticket templates to use for an event as a ticket for entry. To build custom print-at-home tickets
- Log in to your Purplepass event organizer dashboard
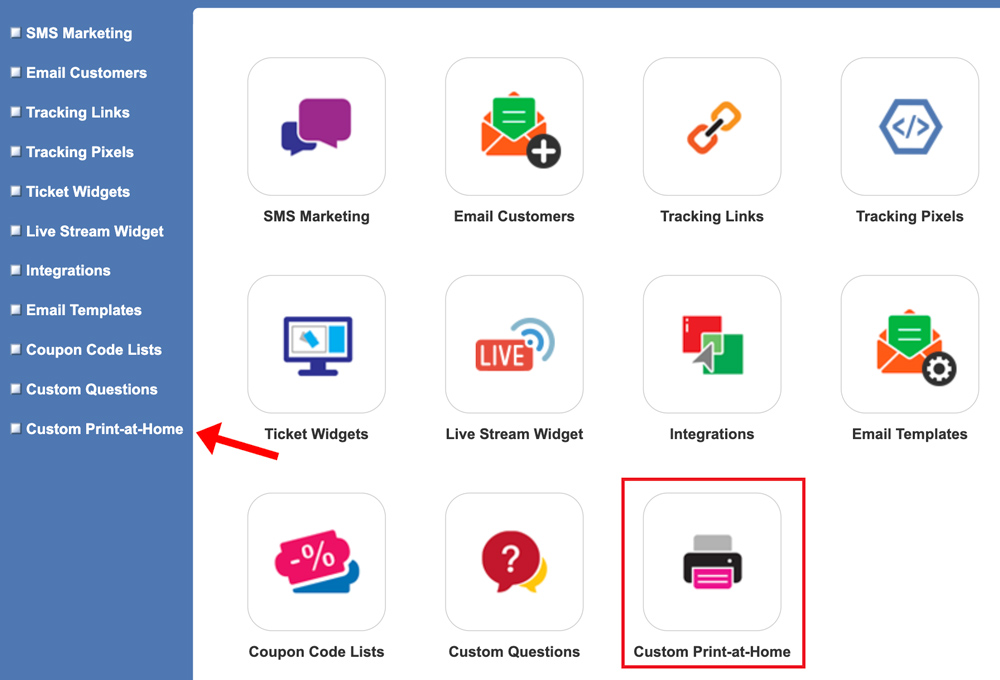
- Select Tools from the top navigation bar

- Click Custom Print-at-Home on the left navigation bar or in the box on the main page
- Once you’re on the Custom Print-at-Home screen, click the purple Create a New Print at-Home button
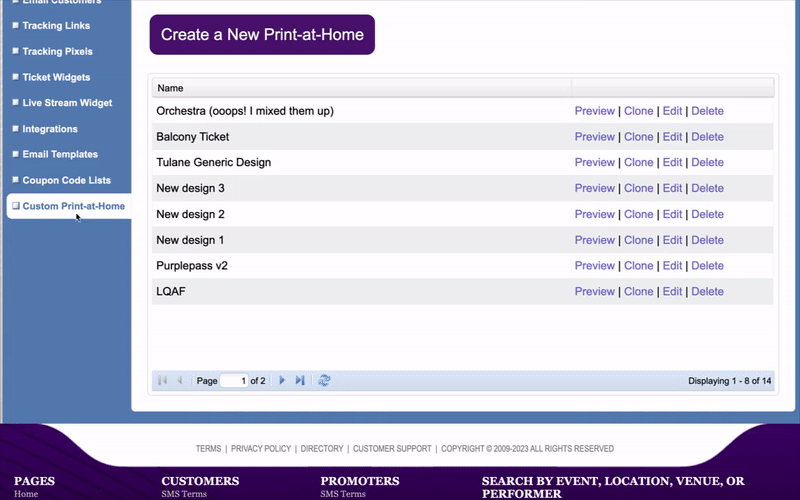
- A new pop-up window will appear titled Create Print-at-Home From
- In the first box titled Name either select an option from the drop-down menu or enter the name you want to use for your custom print-at-home tickets
#1 HEADER - You can check the Custom Image box and a field will appear below allowing you to add your own artwork.
#2 MAP - You have the option to select Custom Image if you don’t want to feature an area map and, instead, want to upload a different image. You can also check Custom image (expanded) to combine #2 and #3 fields to create a larger, singular image.
#3 TERMS AND CONDITIONS - You can select the default option or check Custom terms to create your own terms and conditions. You can also check Custom image to upload an image instead.
#4 REFUND POLICY - You can either keep the default option or check Custom terms and enter your refund policy.
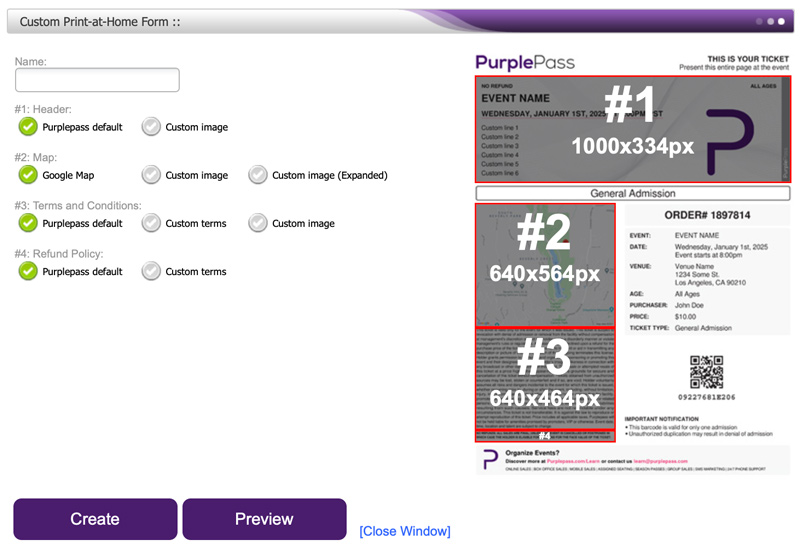
- Click the purple Preview button at the bottom of the window to see what the ticket will look like when completed.
- Once you’re finished adding details, click the purple Refresh Preview button on the right of the screen. If you’re satisfied with the custom print-at-home tickets, select the purple Create button at the bottom of the screen to save your work.
Click here for how to add your print-at-home template to your event.