


Free Course: Preparing your School Event Gate for a Smooth Entry Process (Lesson 8)
The event is here! Now it’s time to set up your registration and gate admission process using online tools, mobile box office and equipment. Plus, create an admittance that is safe, optimizes long lines, heavy crowds, while maintaining social distancing.
Welcome to the last lesson in this free course on digital ticketing for schools. To access previous lessons or start from the beginning, jump down to the bottom of the page and click the appropriate option.

To start out, let’s go over a checklist of things you’ll need for running your event gate:
-
Smart devices to access Purplepass’ mobile app and for scanning
-
Pro wireless scanners or USB gear
-
Receipt printers (if needed)
-
Onsite server
-
Accessories (cash drawers, signage at the gate, line ropes, etc.)
-
Ticket stock or wristbands
-
Crew to help!
-
Access to your mobile box office (the Purplepass app downloaded and ready)
Setting up your event gate
Where to start? Let’s start with what you’ll need to create a smooth entry process, scan tickets, accept payments and all the works. First, you need to determine what equipment you want to run the gate with.
-
Scanners: You’ll need to scan in your guest with scanners; either wireless or attached to your mobile box office.
-
Internet: Because you will be using the internet to look up and process orders, you’ll need a reliable internet connection.
-
Servers: Onsite servers are a must to keep everything running no matter what scenario. These servers will be used to power all box office terminals without the need of the internet. They also communicate with the cloud servers to synchronize data in real-time.
-
Mobile access: Login and access your mobile box office. You can use a smartphone app, iPad gear, or a desktop computer. You will need one of these devices.
-
Printers: If you want to print out receipts or tickets on the spot, you will need receipt and boca printers at the gate.
Other equipment for keeping the lines organized might include roping off lines, tables and chairs for staff, and signage to keep the process organized.
If you don’t know where to start in terms of equipment, you can rent everything from Purplepass by contacting us at support@purplepass.com or visiting this page to rent what you need.
If you’re worried about setting up the hardware or software yourself, turning on equipment or getting the box office started, our staff can virtually install everything for you. You can request this service by getting in touch with your Purplepass representative.
Preparing for the guests to arrive
Let’s start by going over the ticket types you can expect to see.
Print-at-home, mobile, physical tickets, wristbands. Whatever your event supports, make sure you have the right equipment to scan them in. Most likely this will be the job of the wireless scanners or your mobile box office for looking up orders.
Click here to access the Purplepass app for running your event gate.
Now ask yourself, how can you make this process as efficient as possible? No one wants to wait in long lines or face congestion at the gate.
Here are a few quick tips for creating lines that move fast:
-
Use multiple terminals and entry points, not just one check-in point
-
Use wireless scanners and scan throughout the lines
-
Have one line for prepaid guests and one for people who still need to purchase their tickets
-
Rope off lines so people know where to stand while waiting to avoid congested areas
-
Have multiple volunteers help scan in guests or direct them to the right spot
-
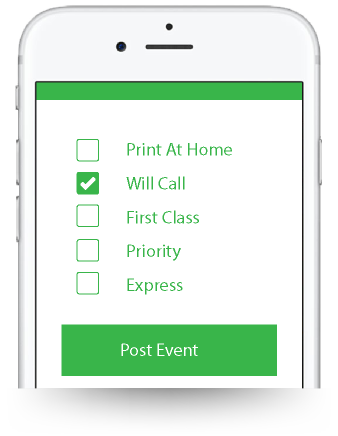
Have separate lines based on delivery types (physical tickets, digital, print-at-home, will call)
If you’re interested in creating a touchless event gate, avoiding the spreading of germs and creating a safe space environment for your guest, check out this free guide - Your guide to creating a touchless event gate.
Quick tips following COVID-19 protocol at the gate
Scanning in your guests
-
Avoid ticket exchanges and encourage the use of only digital tickets and online sales
-
Use wireless scanners to scan at a distance
-
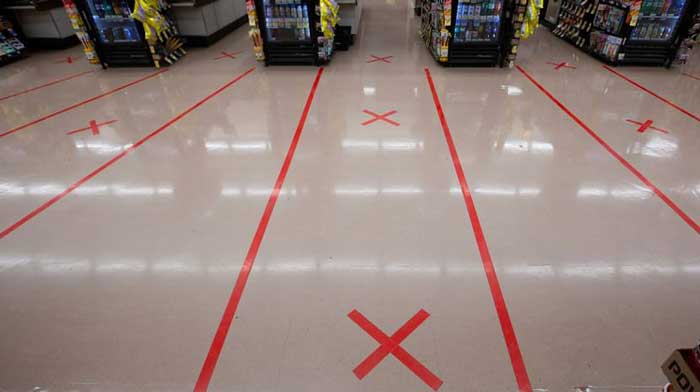
Tap off 6 feet in the lines so guests know where to stand while waiting
Accepting payments
-
Create a separate space for accepting cash
-
Wear gloves when taking payments
-
Require that all purchases be made online if not accepting cash
-
Avoid printed receipts and stick to digital ones sent via email
-
Create a separate line for will call pick ups
Manage crowds
-
Use tape and signage to mark off proper distancing
-
Mark off the flow of traffic with arrows to avoid congestion
-
Have a separate entrance and exit
-
Have volunteers monitor crowds and enforce social distancing rules
-
Only sell at half or quarter capacity for safety
-
If needed, enforce the use of masks or face shields
-
Consider assigned seating for auditoriums or bleachers
-
Work with an open floor plan or venue
Limiting interactions and germs
-
Set up hand sanitizing stations throughout the building
-
Keep doors open so guests don’t have to touch the handles
-
Shorten your event times
-
Avoid small areas
-
Have bathroom monitors to control capacity and lines
-
Sell merchandise in advance, online
-
Create a designated space if media is attending your event
Using your mobile box office
Preparing your guests in advance - what they should know
Especially if this is your first school event using digital ticketing, it’s crucial to properly prepare guests on how it’s going to work. For example, where to purchase tickets, how to enter the event, what to bring, refunds, etc.
Start by creating a list of everything that will be different after switching to digital ticketing. Maybe you are no longer selling tickets at the gate and patrons must purchase their tickets online. Or, all guests need to print out their tickets at home. Whatever the new policies may be, they need to be clearly presented well in advance to avoid surprises or upset guests.
Some Purplepass tools and features you can use for notifying your guests are included below. (Tip: notifications should be sent out weeks or months in advance, before the event. They should be sent out in different formats, multiple times prior to the event.)
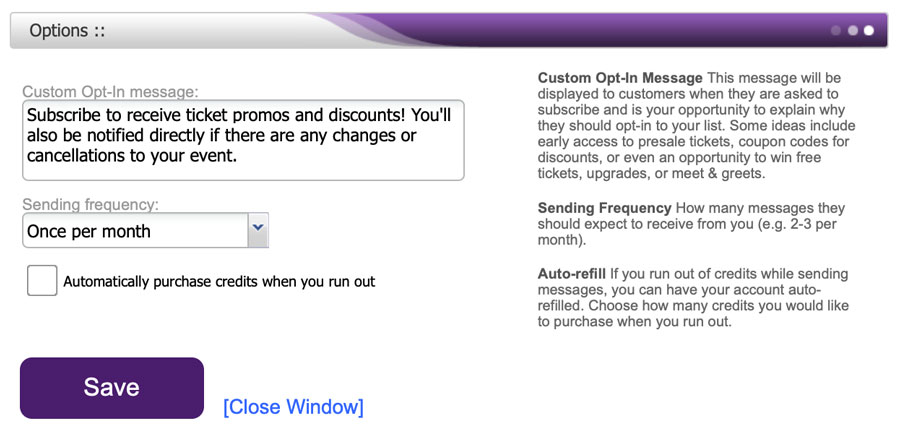
1. SMS messages
We’ve spoken about this tool in previous lessons.
For a quick recap, SMS messaging allows promoters to send messages via text to followers who opt-in to receiving them. These alerts are great for sending quick updates, announcements, ticket links, promo codes and more.
To learn more about using the tool for announcing new protocols and ticket sales, click here.
2. Email Customers tool
The Email Customers tool is accessible in your Purplepass account. Similar to other email scheduling platforms, you can create a personalized message to send to customer lists using advanced filters. Once your email is ready, you can send it or schedule it for later. 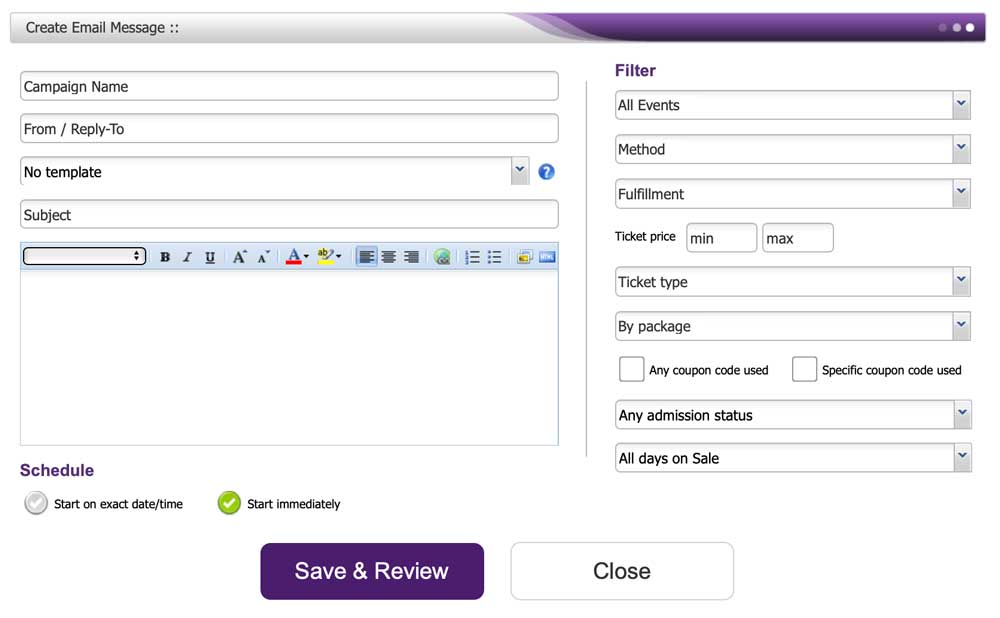
3. Mass emails (email integrations)
Purplepass offers two email integrations; Constant Contact and Mailchimp.
By enabling these integrations, you can sync and add all your customer’s contact information to the account. You can also include your guest list information. If you’re using one of the software mentioned, this syndication makes it easy to connect to your account and notify attendees of these changes.
Other forms of communication:
-
Alerts on your website or accounts
-
Sending out a press release and other forms of PR
-
Traditional advertising (flyers, posters, cards, etc.)
That’s it!!
You finished your course on using digital ticketing for your school(s). Now you’re ready to post your event and start selling tickets.
For more marketing tips and planning hacks, you can subscribe to our blog for weekly posts sent to your email. If you have further questions or need help using a tool in your account, feel free to contact us at support@purplepass.com or call us!
We are always here when you need us.
|
Request a free demoNeed help getting started? Talk to
|

View previous lessons
Lesson 1: Using digital ticketing for your school
Lesson 2: 5 steps for creating an optimized school event page
Lesson 3: Creating ticket types for different school events
Lesson 4: Using ticket pricing rules and ID coupon codes
Lesson 5: Using ticket widgets for your school website
Lesson 6: 10 free marketing strategies for school events
Lesson 7: How to use Purplepass' event management software for schools