Answers
Creating a live stream ticket type option
If you are planning a live-streaming event or want to provide customers with the ability to purchase access to your live stream, you can create a streaming ticket type and embed the experience directly onto your website.
Creating a live stream ticket type
What is a live stream widget?
Similar to ticket widgets, this widget type will act like a portal, giving guests the ability to access the video stream. The widget will be created and installed the same way the ticket widget is through the Purplepass admin.
Use this widget to directly embed the streaming experience onto the event website and avoid any redirects or third-party sites.
When guests go to access the event, they will use the widget. Once they click on the widget, the system will ask them to enter their order number or email address for extra security measures. These extra steps are used to verify whether they have access to that event.
Creating a live stream ticket type
- Log in to your Purplepass event organizer dashboard
- Select Create New Event from the top navigation bar or edit an existing event

- Scroll down to the Ticket Pricing and Options subsection
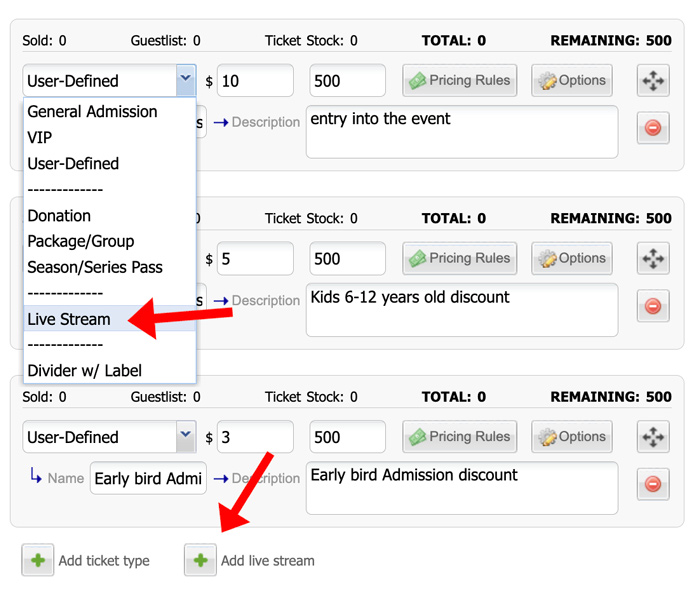
- Click Add Live Stream below the admission type options or previously created ticket types.
NOTE: You can use the dropdown option or select the green plus icon to add the live stream ticket type.
- A new section will appear for adding live stream information
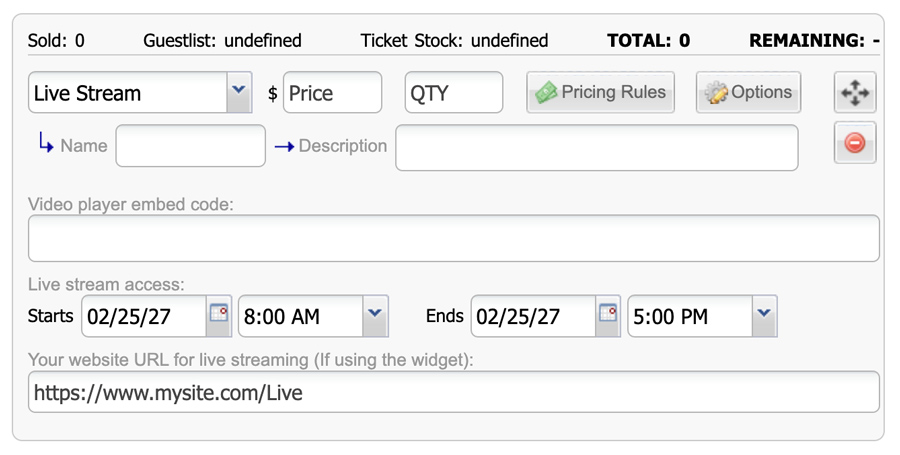
- You can add the details of the live stream from the section that appears. If you want to limit the number of users, you can set the quantity limit.
- Enter the video player embed code you wish to have gated and protected by Purplepass

- Set specific times for live stream content to be available by setting the date and time.
NOTE: You can attempt to access the live stream embed code outside your chosen live stream time to verify that the content is properly gated. Now your live stream video and content will only be available during designated times and dates specified by you.

- If you are using the live stream widget, enter the URL to the page on your site with the widget. This is where we will send people when they click the link in their email confirmation to view the live stream. If you leave it blank, we will send them to purpleass.com/Live.
NOTE: If you are not using the live stream widget, leave it blank.

- Scroll to the bottom of your event page and select Post Event
NOTE: It is possible to add multiple live stream options (along with ticket type options) with each event.