Answers
Selecting the ticket “status” checkbox options when creating an event
If you are creating an event, the status checkbox option section allows you to notify customers about relevant information regarding tickets such as when the tickets are on sale or sold out.
Follow these steps to set the status option for your event.
- Log in to your Purplepass event organizer dashboard
- Edit an existing event or select Create New Event in the top navigation menu

- A pop-up window with three different options will appear. Select the appropriate tab depending on the event you want to create.

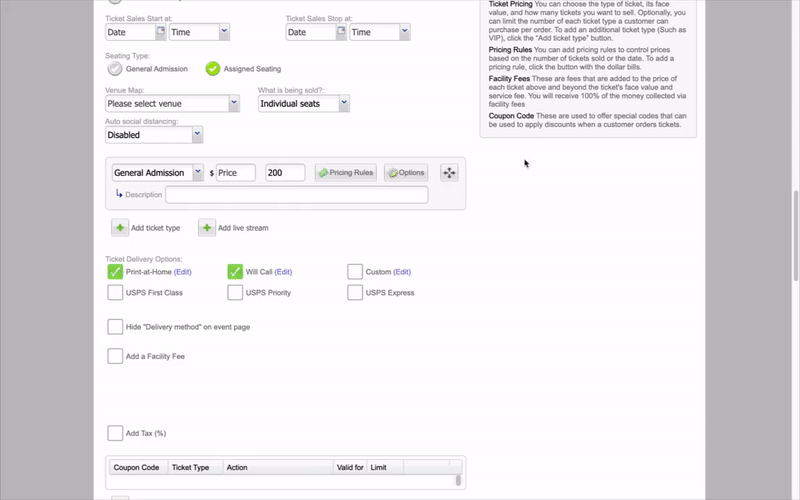
- Enter the relevant information about the event until you reach the Ticket Pricing And Options section
- In the first section of drop-down menus, select Options located to the far right, and click the button
- A pop-up screen labeled Advanced Options will appear
- You will see the Status section
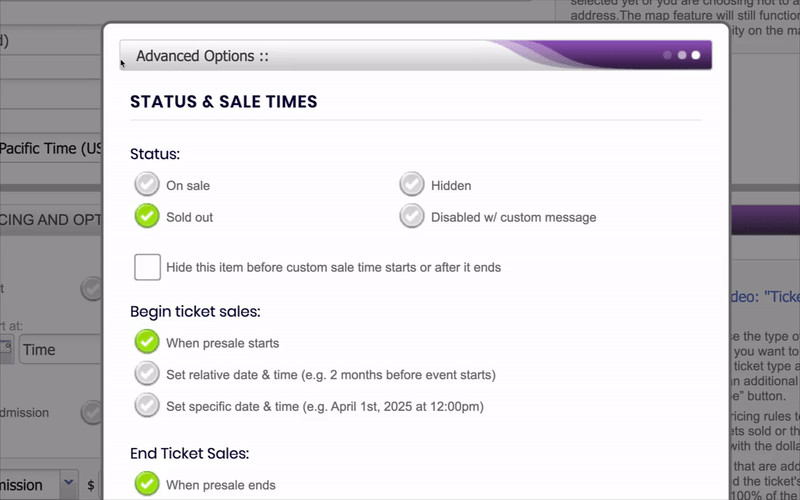

- Check one of the four options available.
- You also have the option to Hide this item before custom sale time starts or after it ends
- Set the start and stop time for your ticket-type options
- Click the Update Options button to save the changes and resume creating your event