Answers
Creating a single promo code for your event
You can create personalized promo codes for your event, from anything from buy-one-get-one to tracking links and group discounts. For more information on how to require a promo code to make a purchase, click here.
Setting the discount type for your event
Setting your date and time limitations
Creating a single promo code
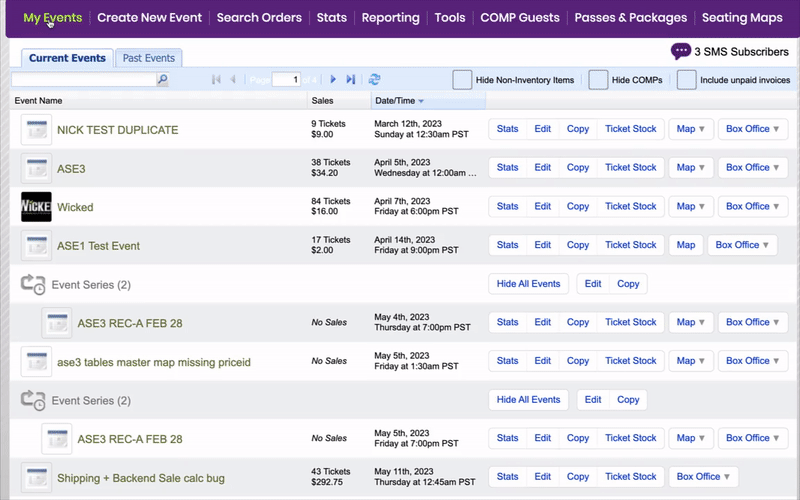
- Log in to your Purplepass event organizer dashboard
- Edit an existing event or click on Create New Event in the top navigation menu

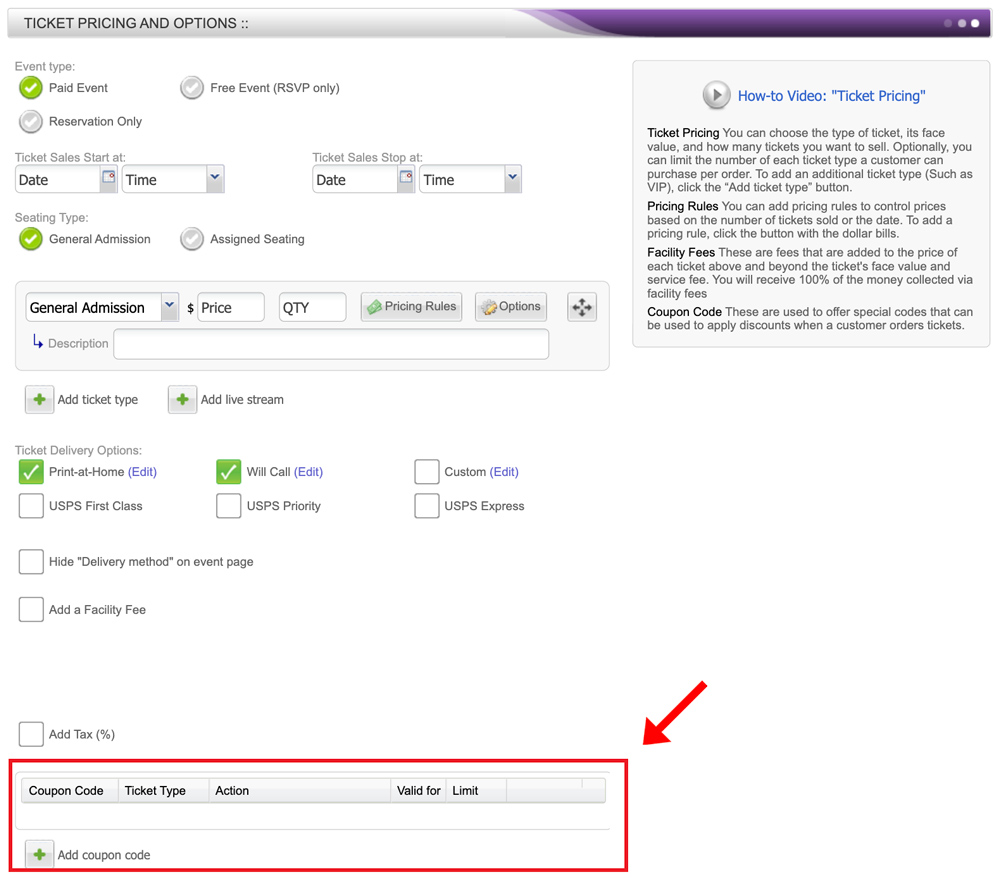
- When creating your event, scroll down the page until you reach the Ticket Pricing and Options section
- At the bottom of that section, select the Add coupon code button located on the left side of the screen
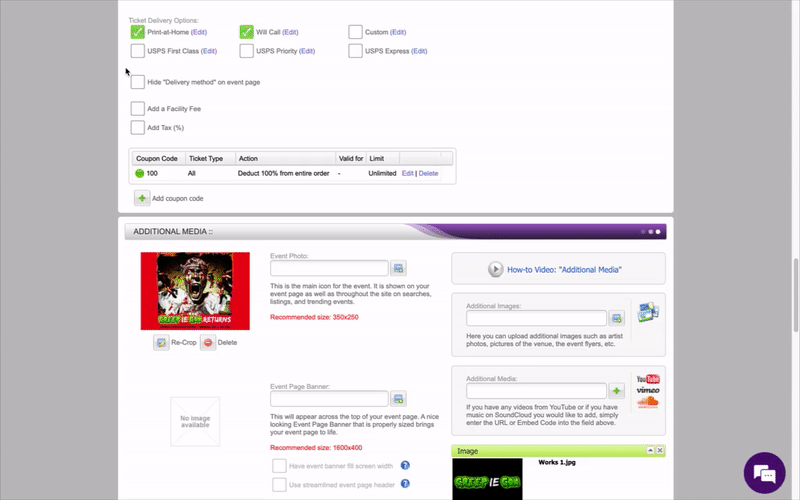
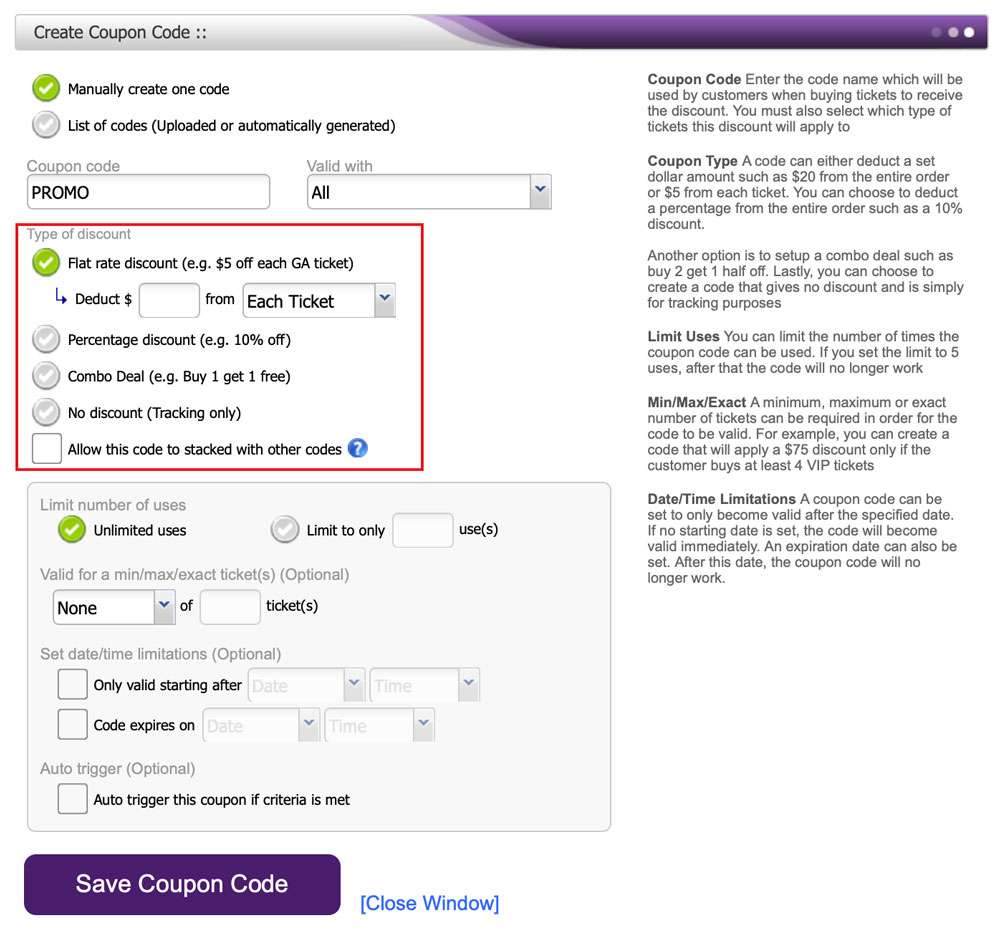
- The Create Coupon Code window will open
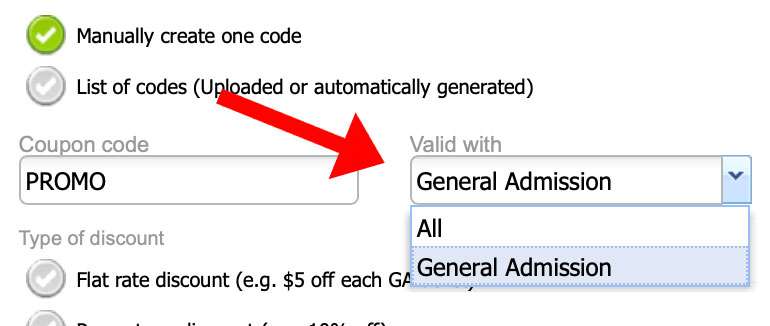
- In the pop-up window, click the box labeled Manually create one code
- Enter the promo code name in the box titled Coupon code
- Next to the Coupon code box, enter the ticket type the code will be needed for in order to make a purchase in the Valid with box
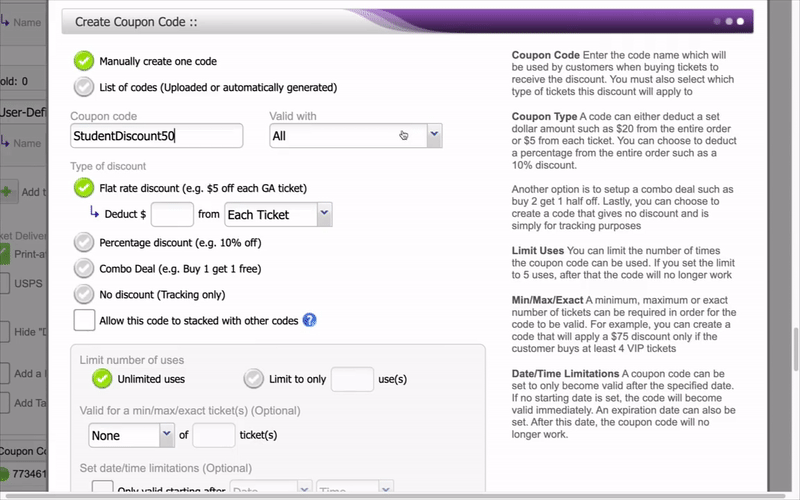
- Check the type of discount you want your single promo code to apply
- Once you've entered all the promo code information, click the Save Coupon Code button
Setting the discount type for your event
If you want to set a specific type of promo code, (ie; percent discount, dollar amount discount, combo deal, flat rate), follow these steps for setting the promo code:
Select the Add coupon code button located on the left side of the screen
- The pop-up window Create Coupon Code will appear
- Click the first checkbox labeled Manually create one code
- Find the section labeled Type of discount
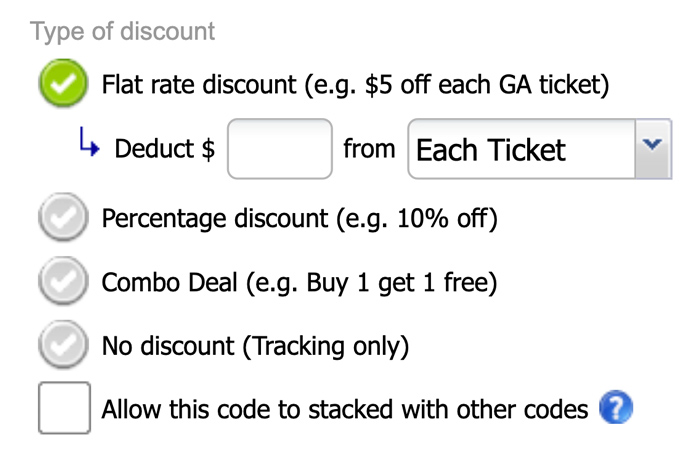
- Check the relevant box with the type of promo code discount you want to apply (flat rate, percentage, combo deal, or no discount)
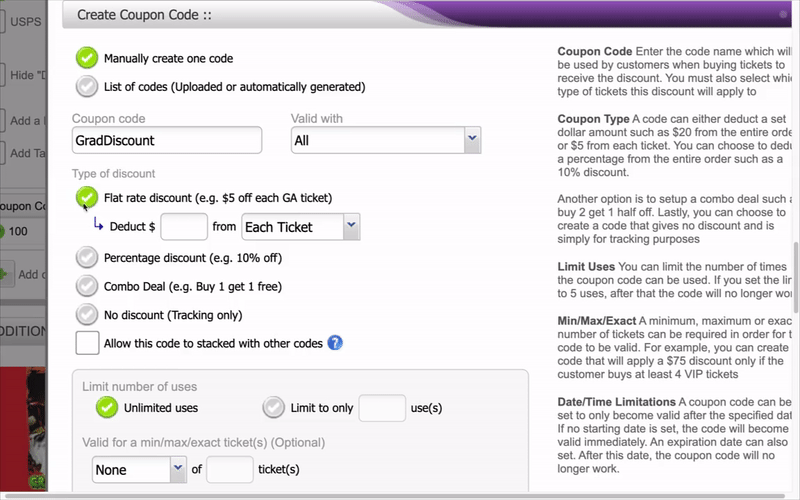
NOTE: A code can either deduct a set dollar amount, such as $20 from the entire order or $5 from each ticket. You can choose to deduct a percentage from the entire order, such as a 10% discount. Another option is to set up a combo deal such as buy 2, get 1 half off. Lastly, you can choose to create a code that gives no discount and is simply for tracking purposes.
- Once you’ve entered your promo code information, click the purple Save Coupon Code button at the bottom of the screen to save your discount
Setting your date and time limitations:
The customer will be required to use a code (their email address) to checkout. No one else will be able to purchase a ticket until the designated time frame.
In the Create Coupon Code window
- Go to Set date/time limitations (Optional)
- Here you set when your promo code is valid and when it expires
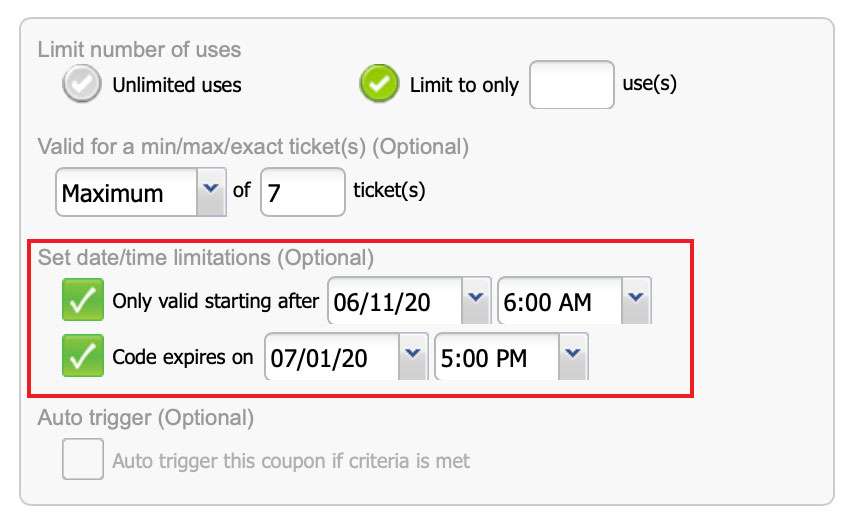 NOTE: A promo code can be set to only become valid after the specified date. If no starting date is set, the code will become valid immediately. An expiration date can also be set. After this date, the promo code will no longer work.